Small Kitchen Organization Ideas: The Complete Guide
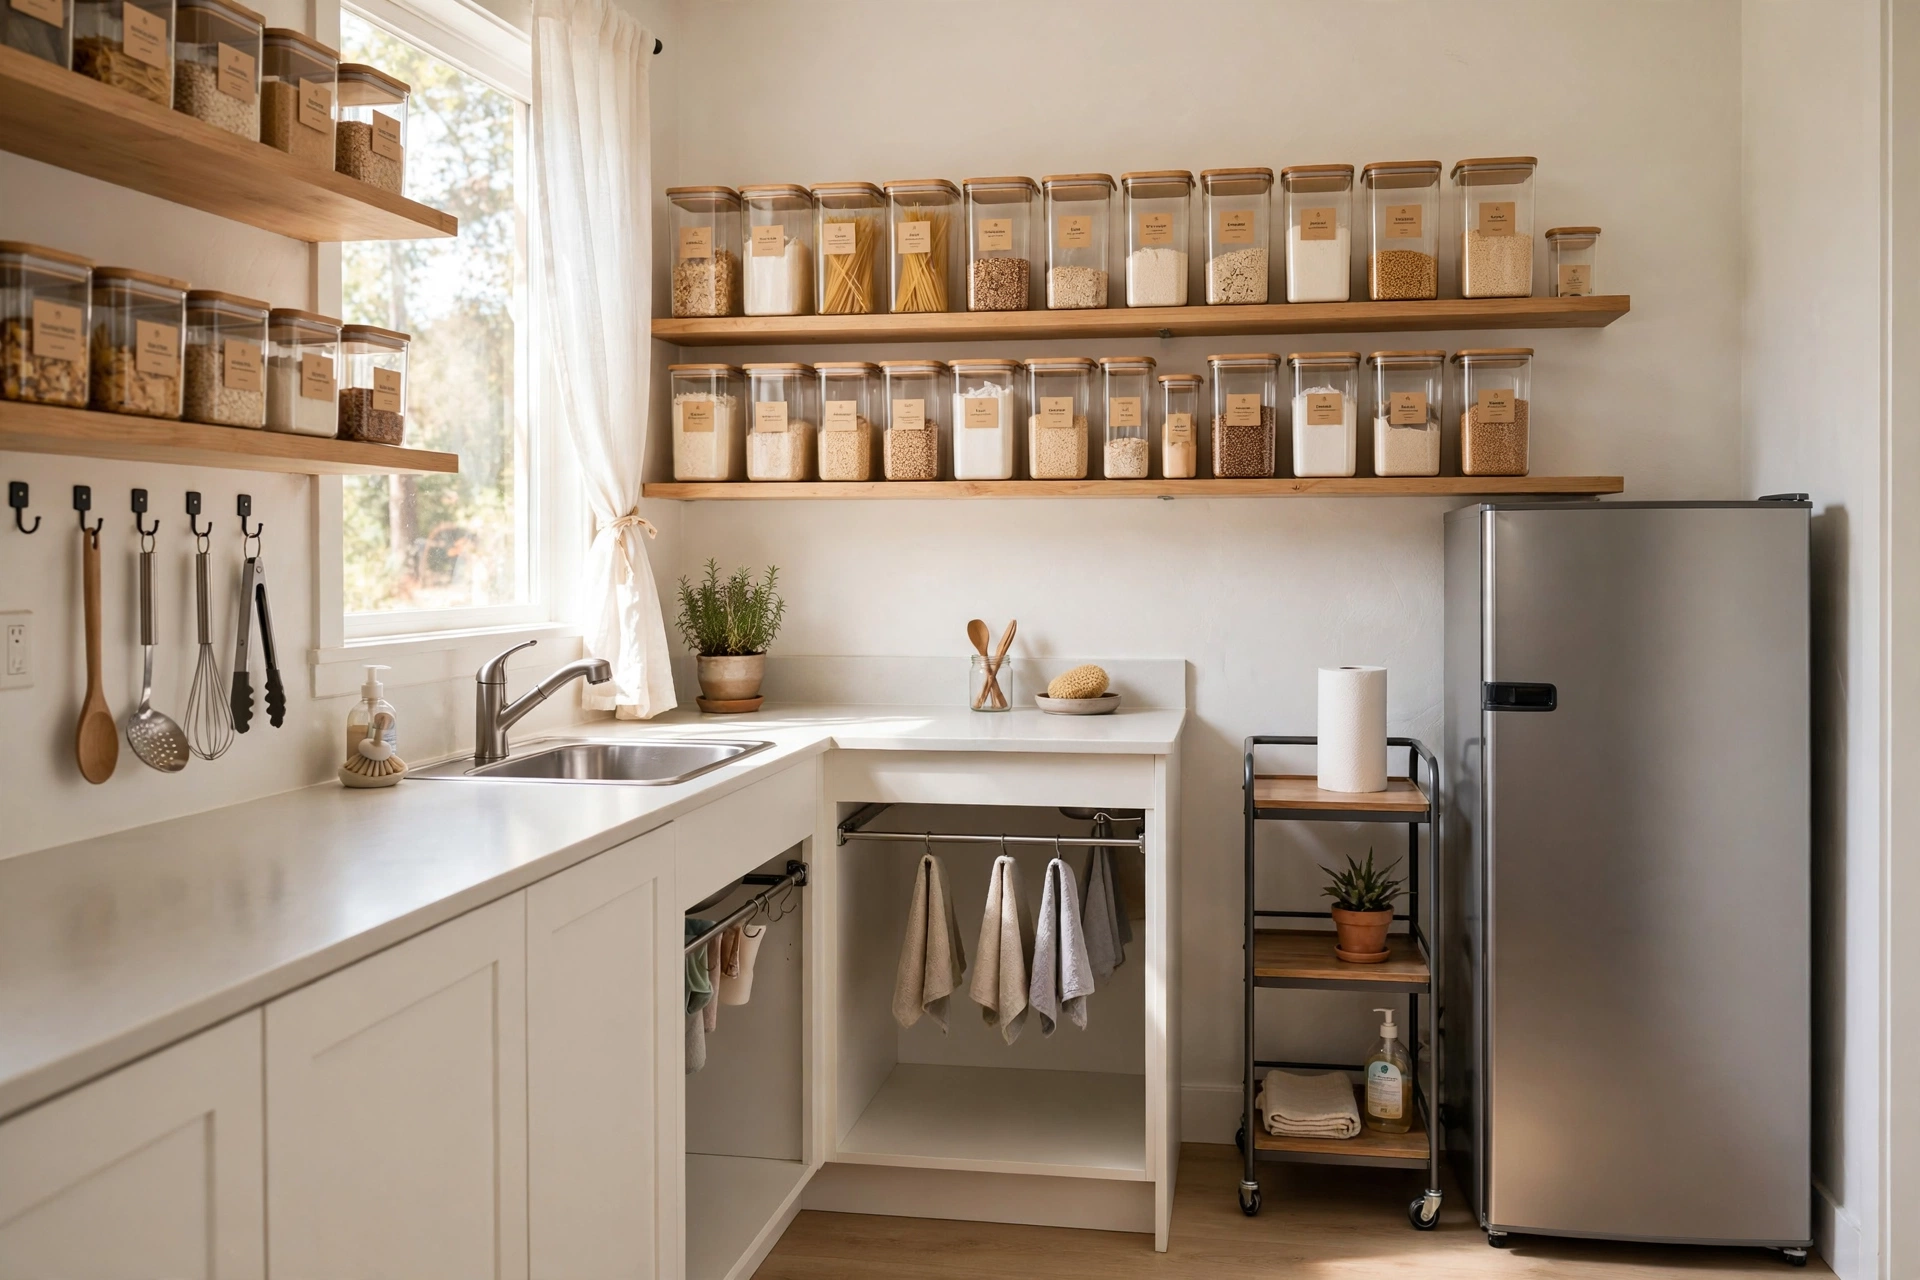
A small kitchen can feel like it's working against you. There's never enough counter space, the cabinets are stuffed, and if you rent, you can't just drill in new shelves or remodel your way out of it. The good news: you don't need a bigger kitchen or a renovation. These small kitchen organization ideas are built for real rental kitchens: organized by zones, designed around vertical space, and using no-drill, removable, budget-friendly methods throughout.
This is the complete playbook. Follow it start to finish once, and your kitchen will stay organized with just a few minutes of upkeep a week.
New here? Browse more ideas anytime in our kitchen organization hub.
1. Start With a 30-Minute Kitchen Reset
Don't buy a single organizer until you've cleared the decks. Most small kitchens aren't short on space, they're full of things that don't belong there. A quick reset makes every step after this easier.
Do this first:
- Clear every counter completely. Put it all on the dining table. Counters are workspace, not storage.
- Toss the expired and the broken. Check spices, pantry items, and the fridge door. Recycle the takeout containers with missing lids and the chipped mugs.
- Rehome the non-kitchen items. Mail, tools, random chargers. Put them where they actually belong.
- Match containers to lids. If a food-storage container has no lid, recycle it now.
- Pick one junk drawer. Empty it, toss the dead batteries and dried-out pens, and put back only what you use weekly.
Put back on the counters only what you use every single day: the coffee maker, the knife block or dock, the dish soap. Everything else earns its counter space or it goes in a cabinet.
2. Organize by Zones: Prep, Cook, Store
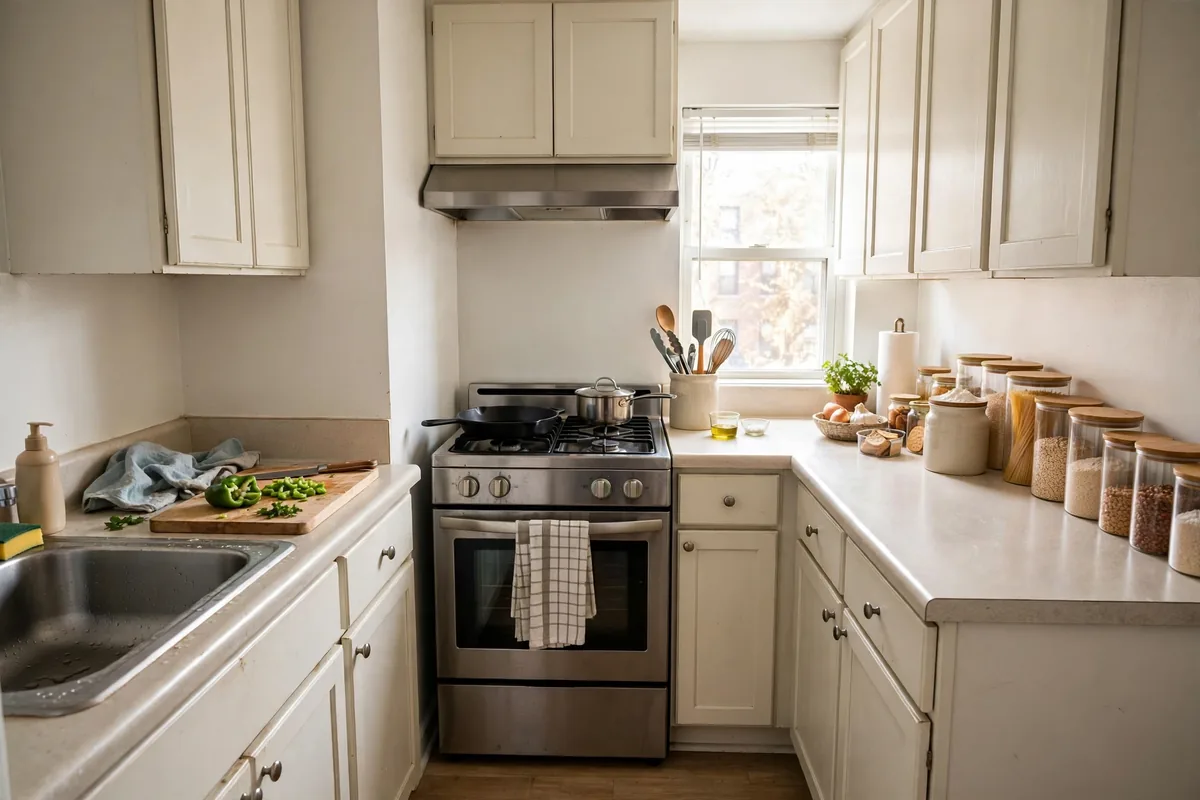
Professional kitchens run on zones, and the system works even better in a small space. Instead of organizing by "where things fit," organize by where you use them. Every item should live as close as possible to the spot where you reach for it.
The Prep Zone (near the sink and main counter)
This is where food gets washed, chopped, and mixed. Keep here:
- Cutting boards (store vertically in a rack or a tension rod divider)
- Chef's knife and paring knife (in-drawer dock or countertop block)
- Mixing bowls (nest them, keep two sizes max)
- Colander and salad spinner
- Trash can or compost bin within arm's reach
The Cook Zone (around the stove)
Everything you grab while cooking should be within one or two steps of the stove:
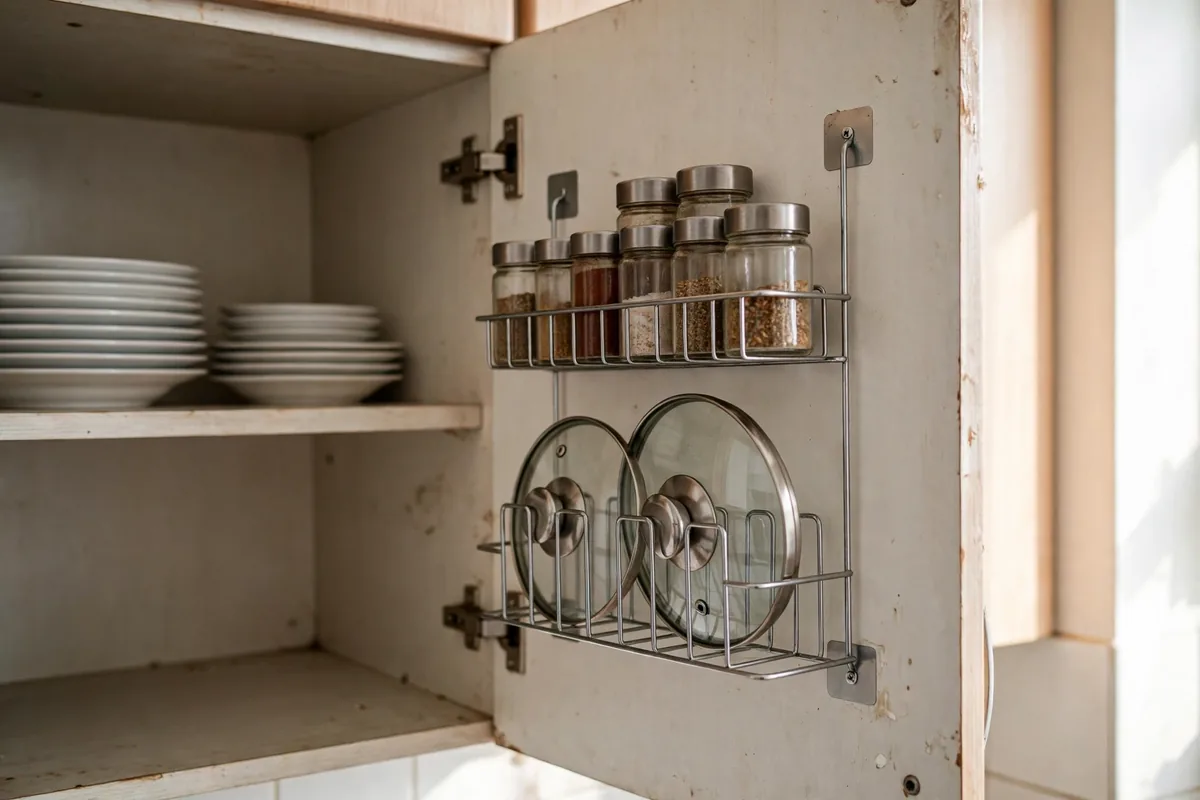
- Pots, pans, and lids (lids on a door-mounted rack or vertical organizer)
- Cooking oils and everyday spices (a small turntable in the nearest cabinet)
- Spatulas, tongs, and wooden spoons (utensil crock by the stove, not across the kitchen)
- Oven mitts and trivets (adhesive hook inside a nearby cabinet door)
The Store Zone (pantry, fridge, and dry goods)
Food storage lives together, separate from tools:
- Dry goods in uniform, labeled containers (pasta, rice, flour, snacks)
- Canned goods grouped by type on one shelf
- Snacks in a single bin so they don't migrate across shelves
The zone rule to remember: if you walk more than three steps to grab something mid-task, it lives in the wrong zone. Move it once and you'll feel the difference every day.
Mapping zones in a galley or one-wall kitchen. When your kitchen is a single row of cabinets, zones stack vertically instead of spreading out. Keep the prep zone at counter height near the sink, the cook zone in the cabinets directly above and beside the stove, and the store zone in the highest shelves and the fridge. Even in one straight line, grouping by task keeps everything within reach.
3. Go Vertical: Your Walls, Doors, and Dead Space
When floor and counter space run out, the only direction left is up. Small kitchens usually have far more usable vertical space than people realize.
Inside cabinet doors. The inside of a cabinet door is free real estate. Stick an adhesive-mounted rack on the under-sink door for sponges and brushes, or mount a slim spice rack inside a pantry door. Measure the clearance first so the door still closes.
The sides of the fridge. A magnetic shelf or magnetic spice containers turn the side of your refrigerator into storage for spices, paper towels, or a shopping list, no drilling, nothing permanent.
Under-shelf baskets. These slide onto existing shelves and create a second layer underneath for mugs, wraps, or small bowls. They double the capacity of a shelf in seconds.
Above the cabinets. That dusty gap between the cabinets and the ceiling is perfect for rarely used items: the holiday platters, the big stockpot, the backup paper towels. Put them in labeled bins so it looks intentional, not forgotten.
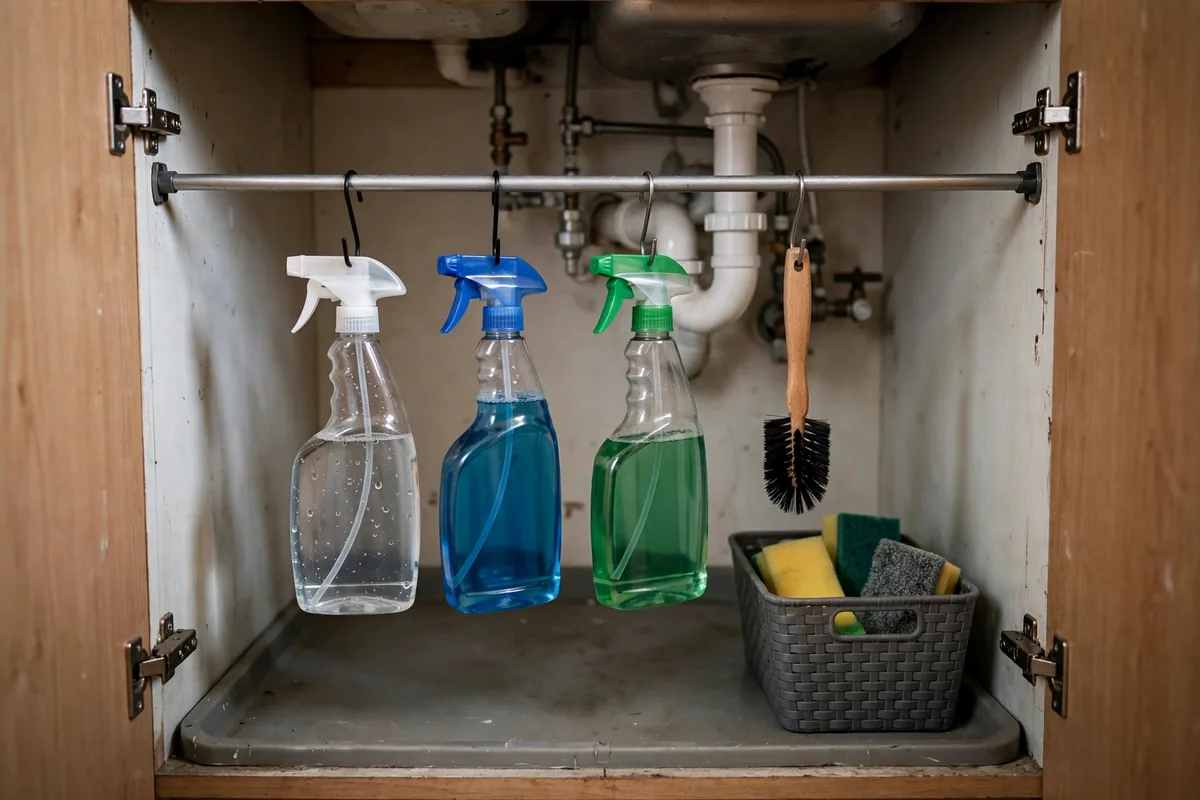
Tension rods. A tension rod under the sink creates a hanging bar for spray bottles, lifting them off the cabinet floor. Another one inside a deep drawer or cabinet can act as a divider for cutting boards and baking sheets.
Wall space near the prep zone. A row of adhesive hooks holds measuring cups, oven mitts, or a small basket for produce. Keep it to a short run, a full wall of hooks starts to look cluttered fast.
4. Small Kitchen Organization Ideas for Renters
Renting doesn't mean settling for chaos. Every idea in this guide is renter-friendly, but this section is specifically about renter-safe methods designed to come down at move-out.
Check your lease first. Most leases allow removable adhesive products even when nails and screws are banned. A quick read now prevents surprises at move-out.
Prep surfaces before sticking anything. The number-one reason adhesive hooks and strips fail is a dirty or greasy surface. Wipe with rubbing alcohol, let it dry completely, then apply. Give it the full curing time on the package before hanging anything.
Respect weight ratings. An adhesive hook rated for one pound will hold one pound: not "about" one pound plus a heavy cast-iron pan. Match the product to the job and they'll hold reliably.
Go freestanding where you can. A slim rolling cart between the fridge and the wall, a freestanding shelf riser inside a cabinet, or a small island cart adds storage without touching a single wall. It all moves with you.
Keep the originals. If you swap cabinet knobs or a shower-style faucet head, bag the originals and label them. Swapping back at move-out takes twenty minutes and avoids one common cause of deposit deductions.
Peel-and-stick labels. Labeling bins and containers is what makes a system stick, and peel-and-stick labels come right off when you reorganize. This is the cheapest upgrade in this entire guide.
5. Tame the Trouble Spots
Every small kitchen has the same four problem areas. Here's how to fix each one.
Under the sink
The pipes make this cabinet awkward, but it's prime storage for cleaning supplies.
- Add a tension rod across the cabinet to hang spray bottles by their triggers.
- Use a small stackable shelf to create two levels around the pipes.
- Put a plastic tray or boot mat on the cabinet floor to catch leaks and drips.
- Store dishwasher pods and trash bags here too: they're used at the sink, so this is their zone.
Pantry and food cabinets
- Decant dry goods into uniform, airtight containers. Matching containers stack neatly and you can see when you're running low.
- Add shelf risers to deep shelves so cans and jars get two levels instead of one.
- Use a turntable (lazy susan) for oils, vinegars, and condiments. No more digging behind bottles.
- Group like with like: baking together, snacks together, canned goods together. Label the zones if you share the kitchen.
Drawers
- Drawer dividers turn one junky drawer into neat rows for utensils, gadgets, and wraps.
- Keep an in-drawer knife dock instead of a countertop block to free counter space.
- Dedicate one drawer to food prep tools (peeler, grater, thermometer) near the prep zone.
Counters
The rule is simple: daily-use items only. Coffee maker, knife dock, dish soap, a small utensil crock. Everything else lives in a cabinet, on a hook, or on a shelf. Clear counters make even the tiniest kitchen feel twice as big, and they give you actual room to cook.
The fridge
The fridge is part of the store zone, and it needs the same system:
- Top shelf: drinks, ready-to-eat foods, and leftovers (most visible = least wasted).
- Middle shelf: dairy and meal-prep containers, grouped in one clear bin.
- Bottom shelf: raw meat and fish, on a tray to catch drips.
- Door: condiments only: it's the warmest spot, so no milk or eggs here.
- One clear "eat first" bin for things expiring soon cuts food waste dramatically.
6. Storage Upgrades Worth Your Money
You don't need much. These are the highest-impact, budget-friendly upgrades for a small rental kitchen, most cost under $25, and all of them are removable.
- Shelf risers: instantly double the usable levels inside cabinets.
- Over-cabinet-door organizer: an extra storage unit that hangs over a door, no screws needed. Ideal for wraps, foils, and cleaning supplies.
- Turntable (lazy susan): ends the "digging behind bottles" problem in deep cabinets and under sinks.
- Stackable clear bins: for the pantry and fridge. Clear means you can see what's inside; stackable means no wasted vertical space.
- Drawer dividers: adjustable bamboo or plastic dividers for utensil and gadget drawers.
- Tension rods (2-pack): one for under-sink spray bottles, one as a cabinet or drawer divider.
- Adhesive hooks (assorted): for inside cabinet doors, the fridge side, and the prep-zone wall.
- Slim rolling cart: slides into the gap beside the fridge or stove for spices, oils, or cleaning supplies.
Buy in this order: measure first, reset the kitchen (Section 1), then buy only for the specific problems you still have. Organizers bought before the reset usually end up holding clutter instead of solving it.
What not to buy. Skip single-purpose gadgets that only do one job (avocado slicers, banana hangers). They eat drawer space. Skip bulky countertop organizers when a wall hook or inside-door rack does the same job for less. And skip anything you haven't measured for: the wrong-size shelf riser or bin is the most common wasted purchase in small kitchens.
7. The 10-Minute Weekly Reset
Organization isn't a one-time project, it's a habit. But the habit is tiny if the system is right. Once a week, set a timer for ten minutes:
- Clear the counters back to daily-use items only.
- Toss anything expired from the fridge door and pantry front.
- Return strays to their zones (the mug in the living room, the scissors in the junk drawer).
- Wipe down the stove and sink area.
- Pick one trouble spot (one shelf, one drawer) and tidy just that.
That's it. Ten minutes a week beats a four-hour overhaul every six months, and your kitchen stays at the "reset" level you built in Section 1.
Frequently Asked Questions
How do I organize a very small kitchen with no pantry?
Treat one cabinet as your pantry and give it the full system: uniform labeled containers, a shelf riser, and grouped zones (baking, snacks, canned goods). Add an over-cabinet-door organizer for overflow and a slim rolling cart beside the fridge for extras. A "pantry" is a system, not a closet.
How can I organize my rental kitchen without drilling?
Lean on four renter-friendly methods: adhesive hooks and strips (prep the surface, respect weight ratings), tension rods (under-sink storage, dividers), over-door and over-cabinet organizers, and freestanding pieces like rolling carts and shelf risers. Check your lease first, most allow removable products.
What's the best way to organize kitchen cabinets in a small kitchen?
Organize by zone: keep prep tools near the sink, cooking tools near the stove, and food together in one area. Inside cabinets, add shelf risers for a second level, use turntables in deep corners, and mount slim racks inside doors. Store daily items between shoulder and knee height; rarely used items go up high.
How do I keep small kitchen counters clutter-free?
Allow only daily-use items on the counters: typically the coffee maker, knives, dish soap, and a utensil crock. Move everything else into cabinets, onto hooks, or onto shelves. Do a 60-second counter sweep each evening so clutter never builds up.
How do I organize under the kitchen sink in an apartment?
Hang spray bottles from a tension rod mounted across the cabinet, add a small stackable shelf to work around the pipes, and put a plastic tray on the floor to catch leaks. Keep only cleaning supplies here, it's the cleaning zone, not overflow storage.
How do I organize a small kitchen on a budget?
Start free: reset, declutter, and rezone with what you own. Then spend small and specific: a tension rod or two, a pack of adhesive hooks, and one set of drawer dividers solve most problems for under $30 total. Dollar stores carry surprisingly good bins and turntables; just measure your shelves before you go.
The Next Step
You don't have to do all of this today. Pick one zone (the prep area, the under-sink cabinet, or the pantry shelf) and give it the full treatment this weekend. Once you feel how much easier one organized zone is, the rest follows naturally.
And when the kitchen is done, the same zone-and-vertical-space system works everywhere else. Start with our Complete Small Apartment Organization Guide to bring the whole apartment up to the same standard, or keep exploring the kitchen organization hub for room-specific ideas.